The 13th island of Poptropica, Skullduggery Island was released to general free use on June 17, 2010 (Early Access to paid monthly members was on May 20, 2010.)
*This is a complete walkthrough but each user will experience slightly different game play according to random acts such as battles and hazards. No two games will play exactly the same, and the trading skills of the player will alter the time required to complete the island. This solution contains spoilers.
---
Playing the Island(s)
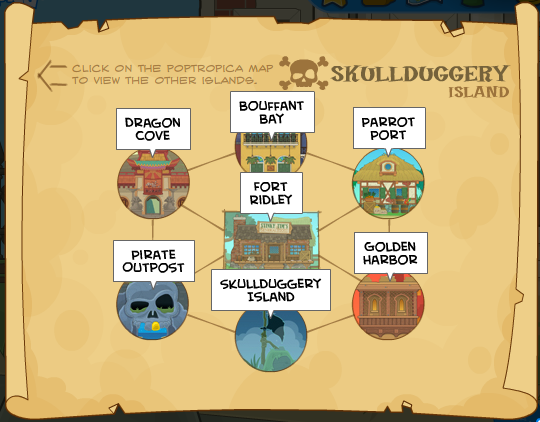
Enter the island from the Island Map (members had Early Access May 20, 2010) and climb down to Fort Ridley, one of a few small islands scattered about in the sea. For the first part of the island, you will collect items that lead to other items and clues. Once you have a ship, trading and battles will be part of the island quest.- Travel down Main Street to the right and cross the covered bridge. On the far side, climb down into the stream and go left to get the Doubloon from the sand.
- Return left to Stinky Tim's General Store, and use the doubloon to buy a bag of chicken feed. Also go to the upper right shelf to get the Broken Mirror.
- Give the feed to the boy with the chickens. He will give you a chicken.
- Head right again, across the bridge to the corn farm. Use the chicken to eat some of the bugs, and the farmer gives you a Blue Candle.
- Go far right. past the Governor's house, to the sea edge and talk to the woman there whose husband is lost at sea. (This is not necessary but part of the story.)
- Enter the Governor's house and use the Blue Candle to reveal the missing writing on the Parchment. The Governor will tell you about the Treasure Map and the need to defeat Captain Crawfish the pirate.
- Go back to the Fort and use the telescope at the top, where you will see a small raft. Signal the raft using the Broken Mirror, and it will dock.
- The beach woman's husband is aboard the raft, and is grateful to be home. He gives you his ship, which is now crewed by a cabin boy and the old sailor from the fort.
- Aboard Your Ship : raise anchor and sail to Dragon Cove, up and to the left of Fort Ridley. Avoid sea creatures, and especially pirate ships, but try to pick up salvage items in the water.
- Disembark at Dragon Cove, home of Ship-Shape shipbuilders. To find the map piece, go to the water's edge and stand on the sunken statue to reveal a Mallet. Push the old fisherman to the right, past the giant Bell Gong, to near the first barrel. Then hit the Bell Gong with the mallet. This will send fish up for the old man to catch, and he will give you the map piece. You cannot immediately afford a new ship, or the services of the Shipwright, who can repair damage while underway. Ships and crew cost thousands of doubloons. You can buy a small cargo with your doubloons, preferably Silk which is cheap here but more valuable elsewhere.
- Sail to Bouffant Bay, to the right, again avoiding damage but picking up salvage from the water.
- You can help the worker on the dock, but you will not need his clue. Go right until you see the island's trader, who will buy any salvage, or your Silk cargo from Dragon Cove at a premium. Here, it is Medicine that is cheaply purchased. Go right to the residence with three Hanging Fern Baskets. Jump up into the 3rd, then the 1st, then the 2nd (middle) one. The map piece will appear. In the nearby Willard's Warehouse is the Cargo Master, who can increase your cargo space for any ship by 50%. He is also not affordable at the start. Be sure to buy a cargo of Medicine.
- Sail to Parrot Port, directly below. Sell your salvage and cargo, but there is no cargo to cheaply purchase here. In Petey's Pirate Pub is the Navigator, who can increase your sailing speed if you hire her. At upper left is a Cracker. Go back to the Trading Post and locate the Parrot. It will tell you to dunk yourself in the sea and come back to find it. When you do, it wants you to block some smoke, which refers to the nearby chimney you can stand on. Now the parrot is at the palm tree at far right, and tells you to see the pirate in the tower near the shore, who is the parrot's owner. Go to him, then locate the parrot flying above the buildings. Use the cracker to lure him back to the tower, where the pirate gives you the map piece.
- Sail to Golden Harbor, directly below, home of the Golden Harbor Bank. You can borrow doubloons equal to your current net worth, and make larger profits with the capital. You can have the loan for up to 20 days at 5% interest per day. To get the map piece here, you have to light three of the five street lights, some of which go out when others are turned on. You should light the 4th, 2nd, and 1st in that order. The map piece appears in a draped archway.
- Sail for the Pirate Outpost, directly left, and dock there. Sell your grain and buy Spice, which is cheap here. Climb up the giant skull, jumping over hostile pirates. In the cannon shack is the Cannoneer, who you may wish to hire later. At the top of the mast is a "cannon starter kit" (fuses), which will fire any of the four cannons on the outpost. Push the small barrel of explosives off the mast and into the water below. Swim it over to directly under the Golden Tooth of the rock skull. Go left and fire the cannon there. Hitting the barrel will shake loose the Golden Tooth and reveal the hidden map piece.
- The Circular Trade Route : Sail back to Dragon Cove, directly up, and sell the Spice there. Now you have established a clockwise "trading route" that will enable you to slowly build your wealth and buy larger ships and more cargo, and eventually hire some or all of the four helpful skilled crewmen. The Dragon - Bouffant - Parrot - Golden - Pirate route is not required, but workable. There are no shortcuts, but your progress is much faster as you increase your ship size and speed.
- Winning the Game : When you have the largest class of ship, the Phoenix Warbird, and the skilled Cannoneer, you are more than a match for any ship, even Captain Crawfish. Sail to battle him off Skullduggery Island. When he is defeated, return to the Governor's house at Fort Ridley. He will give you the location of the Buried Treasure and a Bone Shovel to dig it up.
- Travel to the island and dig at the mound 6 paces right of the Black Flag. After the treasure is out of the hole, you will be surprised by Captain Crawfish and his crew, and a spy who posed as an aide to the Governor.
- Unfortunately, there is no duel. Your crew sails in to save the day, and you return the treasure to Fort Ridley, where the Governor awards you the Island Medallion!
Hints:
1) Getting sunk in battles (or otherwise sunk) will lose 10% of your doubloons and 10% or 13% of your cargo.
2) Use your anchor to control your ship around salvage and rocks.
3) Don't spend so much on a ship that you cannot buy a full cargo for it.
Quirks:
1) The game is currently very buggy around the finish, losing days or entire characters. Be prepared to reboot rather than start the island over!